July 1, 2022

Tools for smoothing Concrete
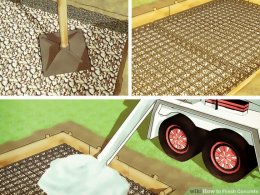 If you are unfamiliar with pouring concrete, follow the linked instructions to ensure you do so correctly. Be ready to move on to the next steps as soon as you pour. Compress the concrete only if necessary. Many modern concrete mixes do not need to be compressed, or "tamped", before finishing, and tamping the wrong mix can weaken the slab. Confirm your decision with a professional before tamping.
- If you do decide to tamp, simply press the concrete down using any variety of tamping tool (hand, rolling, etc.).
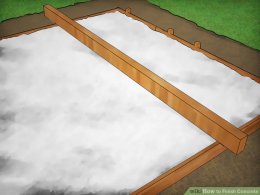
Place a 2x4 across the concrete. Find the straightest lumber 2x4 you can find and place it across the barriers holding the concrete in place, or "forms". The 2x4 should extend at least a foot past the forms in each direction. This object is referred to as a screed board.
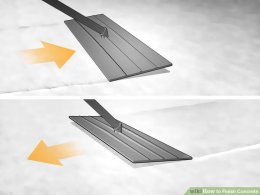
Use the 2x4 to level the concrete. Using the technique described below, move the 2x4 down the forms to remove excess concrete.- Use a sawing motion to pull and push the 2x4 across the concrete as you move it down the length of the forms. This sawing motion helps prevent tearing as you level the surface.
- Tilt the leading edge slightly away from the direction of travel to create a thin cutting edge where the screed board meets the concrete.
- Keep at least a 1 inch (2.5cm) hump of concrete in front of the edge at all times.
 This will fill any holes in the concrete's surface.
 - Pour and level in stages for larger projects.
- At the end of the slab, push the excess concrete against the forms for easy removal with later tools.
Part 2
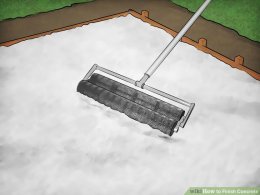
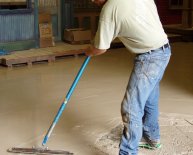
Finishing, Stage One- Immediately level and prepare further using a bull float. The bull float is a flat, long-handled tool used to flatten minor ridges and holes, as well as embed aggregate particles further into the concrete, bringing the smoother "cream" consistency concrete to the surface for better finishing.
- Move the bull float back and forth across the slab, perpendicular to the direction you moved the leveling board. (In other words, move the bull float between the two forms the 2x4 was resting on.)
- Slightly lift the leading edge to create a smaller cutting edge of contact, lifting the tool toward you when pushing and away from you while pulling.
 Don't overdo it; the edge of the tool should remain level with the concrete.
 - Try to finish this process before any "bleed water" leaks out onto the concrete's surface.
- Use an alternative tool (optional). A darby is a short-handled tool that serves the same purpose as a bull float for smaller projects. A "power float" or "helicopter" is a powered tool used on large projects.
- Move the darby back and forth in overlapping arcs until the whole surface has been covered twice.
- A power float requires two people to place it carefully onto the slab, but only one to operate it. It takes a little practice to work properly, so stay near the center of the slab while you're learning to avoid damaging the concrete's edge.
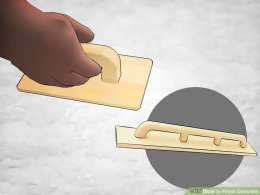
- Tidy the corners using a smaller tool. An edging tool is designed to create level edges and corners next to the form, where your larger bull float or darby is less accurate. This will create more durable edges as well as improve the concrete's appearance.
- Use a back-and-forth motion in a 1- to 2-ft. (0.3–0.6m) area before moving on to the next. As with previous tools, lift the leading edge of the tool.
- Don't press too deeply into the concrete; this can create impressions that are difficult to remove.
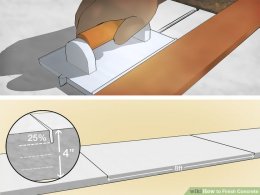
- Cut grooves into your concrete. These are called control joints and direct the concrete's inevitable cracking in such a way that appearance and functionality are minimally affected. These should cut 25% of the way through the concrete's depth.
- The distance between joints should be no more than 24 times the thickness of the slab.
 If you are working in the imperial system, calculate this by doubling the thickness of your slab in inches and using that measurement as feet. (For instance, a 4" (10 cm) slab should have joints no more than 8' (2.4m) apart.)
 - Every inside corner of your slab and every corner that touches a building or step should have a control joint extending from it, as these are common cracking locations.
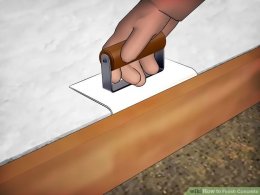
- Use a straightedge or snap line to lightly mark the joints before cutting and keep your tool straight as you cut.
- A grooving tool works well for most projects. If your concrete has already started to dry and crack, use a dry-cut saw that can cut to the desired depth. For extra large projects, use a long-handled marking tool.
- The distance between joints should be no more than 24 times the thickness of the slab.
- Wait for the concrete to partially dry. It takes experience to learn the correct timing for concrete, since its drying speed depends on many factors such as the characteristics of the mix and the local temperature and humidity. Here are the basic details:
- As the concrete sets, excess "bleed water" will rise to the surface. Wait until this water has evaporated and the wet shine of the concrete has started to disappear.
- If the concrete is still quite wet and forms ridges when you move on to the next step, wait longer.
- If the concrete becomes too hard and dry to finish properly, throw additional water onto its surface. This is a last resort as it will result in weakness and scaling in the final slab.
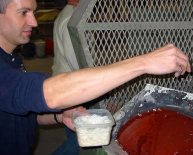
- Apply a color hardener (optional). If you are coloring your concrete using a powder that adds color to the top layer, apply this in the amount specified on the label while the concrete still has a full wet shine. It will still require a little more drying before you proceed to the next stage.
- Only use on horizontal surfaces and with proper safety equipment to avoid inhalation.
Share this article
Related Posts
Latest Posts


